Integration Setup Guide

Connect Gmail to IntelBuddy
Send emails through natural conversation. Compose, review, and deliver — all from your chatbot.


This Guide
App Password (SMTP)
Quick setup using a Gmail App Password. Best for sending emails.
Send emails
Custom sender name
5-minute setup
— Cannot read inbox
Advanced
Gmail OAuth (API)
Full Gmail API access via OAuth. Read, search, and send emails.
Send emails
Read & search inbox
Full Gmail features
— Requires Google Cloud setup
Send Emails
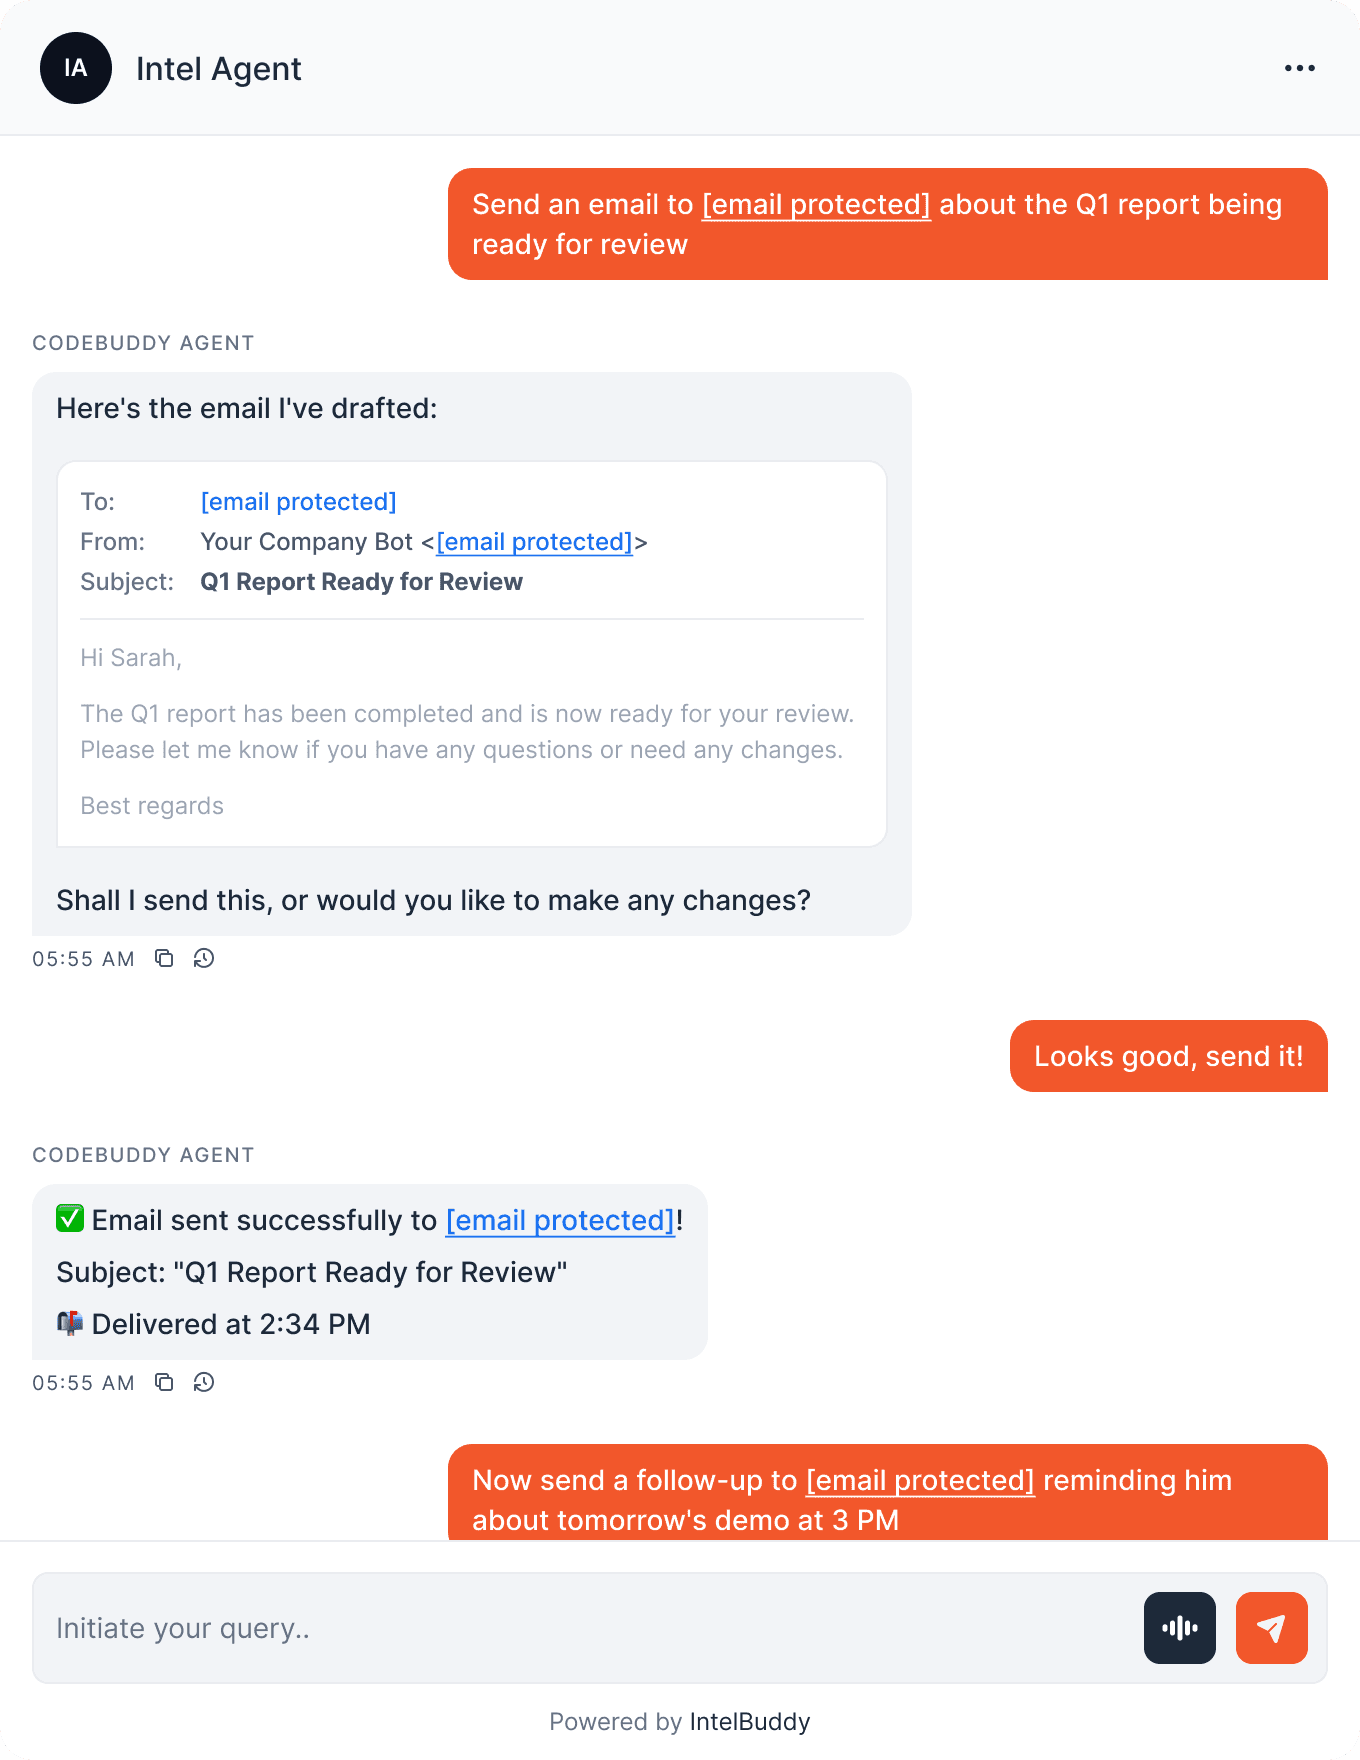
"Send an email to John about the meeting" — composed and sent instantly.
Draft & Review
The bot drafts the email and asks for your approval before sending.
Multiple Recipients
Send to multiple people, CC/BCC — all from a single chat command.
Custom Sender Name
Emails show your brand name, like "Acme Support" or "IntelBuddy Bot".
Templates
"Send the onboarding email to [email protected]" — reuse templates easily.
Follow-ups
"Send a follow-up to yesterday's email" — contextual email chains.
Before You Start
Prerequisites
Step-by-Step
Setup Instructions
Connect Gmail using an App Password. Takes about 5 minutes.

Enable 2-Step Verification
Google requires 2-Step Verification before you can create App Passwords. If you've already enabled it, skip to Step 2.
Go to your Google Account → myaccount.google.com
Click Security in the left sidebar
Under "How you sign in to Google", click 2-Step Verification
Follow the prompts to enable it (you'll verify with your phone)
👤
Google Account
🔒
Security
📱
2-Step Verification
✓
Enabled
Generate an App Password
App Passwords let IntelBuddy send emails on your behalf without needing your actual Gmail password.
Go to Google Account → Security → App passwords
You may need to sign in again
Under "App name", type IntelBuddy (or any name you'll remember)
Click "Create"
Google will show you a 16-character password
Copy it immediately — you won't be able to see it again
myaccount.google.com/apppasswords
🔑 Your App Password
Your app password for "IntelBuddy":
Copy this password now. You won't be able to see it again.
Copy
Done
Copy it now! Google only shows the App Password once. If you lose it, you'll need to delete the old one and generate a new one.
This is NOT your Gmail password. An App Password is a separate 16-character code. Never share your actual Gmail password with any service.
Paste Into IntelBuddy
Enter your email address, App Password, and optional sender name.
Log in to IntelBuddy
Go to Settings → Integrations → External Tools
Find the Email (Gmail) card and click "Configure"
Fill in the fields as shown below
Click "Save / Connect"
IntelBuddy → Settings → Integrations → Email (Gmail)
Configure Email (Gmail)
No API keys needed. Just choose your preferred search backend and click connect.
Sender Email *
[email protected]
App Password *
abcdefghijklmnop
Sender Name
Your Company Bot
Save & Connect
Cancel
Tip: Enter the App Password without spaces as a single 16-character string (e.g. abcdefghijklmnop).
Verify Connection
Once saved, the Email card should show a green "Connected" badge.
Email (Gmail)
🟢
Connected
Security note: Your App Password is encrypted and stored securely. It only grants permission to send emails — it cannot access your Google Drive, Calendar, or other services.
🎉
You're All Set!
Your IntelBuddy chatbot can now send emails on your behalf through Gmail.

Try It Out
Example Conversations
Here's what you can say to your IntelBuddy chatbot now that Email is connected.
Quick Reference
Things You Can Say
Sending
"Send an email to … about …"
"Email [person] saying …"
"Send this to … and CC …"
Drafting
"Draft an email to … about …"
"Write a formal email to …"
"Compose a follow-up email"
Tone & Style
"Make it more formal"
"Keep it casual and short"
Bulk & Templates
"Send the welcome email to …"
"Email the team about …"
"Send the same email to … and …"
Need Help?
Troubleshooting
"Authentication failed" error
Make sure you're using the App Password (16 chars), not your Gmail password. Regenerate the App Password from Google Account → Security → App Passwords if needed.
"App passwords" option not visible
2-Step Verification must be enabled first. Go to Google Account → Security → 2-Step Verification and turn it on, then App Passwords will appear.
Email sent but not received
Check the recipient's spam/junk folder. If using a new Gmail account, emails may initially be flagged. Also verify the recipient address is correct.
"Less secure app" warnings
App Passwords are the modern, secure method — you should NOT need to enable "Less secure apps." If you see this warning, make sure you're using an App Password, not your regular password.
Sender name shows your email instead of display name
Make sure you filled in the Sender Name field in IntelBuddy. If left blank, Gmail will use your default account name.

Ready to transform your supports and insights? Join growing companies using Intelbuddy to automate support and make faster decisions.
Start for free. No credit card required. Cancel anytime.
© 2026 IntelBuddy. All rights reserved.
